- June 19, 2026

-
-
Loading
Loading
Skill level: 3 out of 5
Cost: 4 out of 5
Time: 3 days
Supplies:
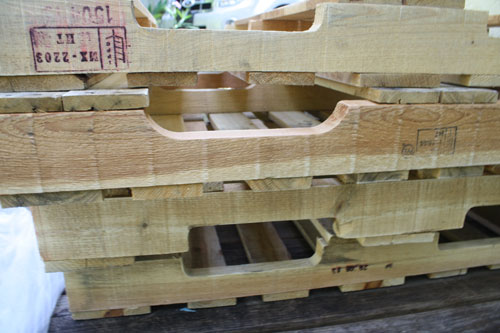
1. Find your pallets
Finding eight pallets can be an issue, especially during the rainy season. To make things easier, there are services through which you can purchase pallets. The most important part is that they haven't been exposed to lots of rain and humidity and that they are in good shape. Pass on pallets that smell, look oily or are stained. The newer-looking pallets are more trustworthy. You could always scrub them down with bleach and soapy water and lay them out to dry.
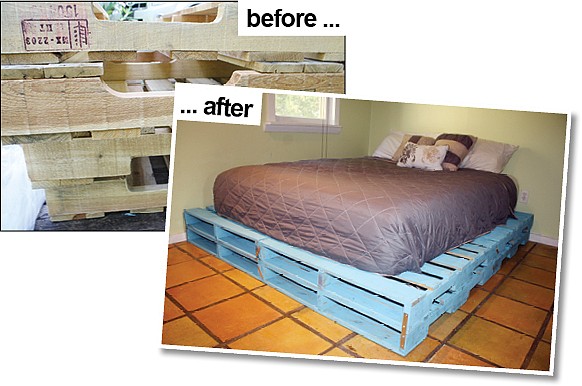
Eight pallets provided about a 10-inch platform '” another four would make the bed higher. You would have to do some measuring and cutting for any other size bed.
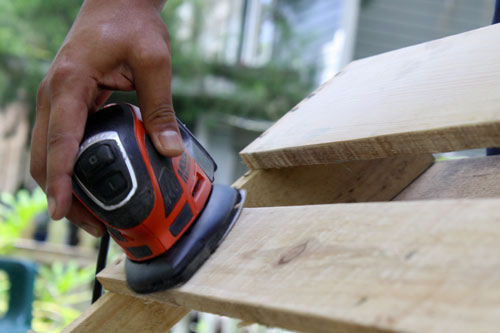
2. Sand
Use an electric sander to sand all the reachable areas of each pallet. Take care to get all of the edges. The less it's sanded, the more the paint will soak in. It takes about 15 minutes to sand each pallet. If you wear gloves, it can decrease the soreness of your hands when you are sanding the last pallet.
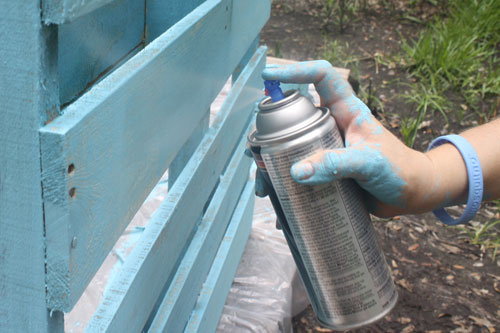
3. Apply paint and polyurethane
You could save a little time and buy spray paint, but it limits your color options and makes it look more finished as opposed to rustic. If you want it to look shabby chic, it's best to apply paint with a brush. If you're going for the brush method, like we did, just know this step takes the most time. Dip your brush about one inch into the paint and apply sparingly. If you can see a little of the wood color, that's a good thing. If it dries and you want to make it look more rustic or worn, you could always go over the paint with a sander around some of the edges. Apply polyurethane (see photo above) to protect your wood bed frame. If you choose white paint, use a water-based polyurethane; oil-based can turn yellow over time.
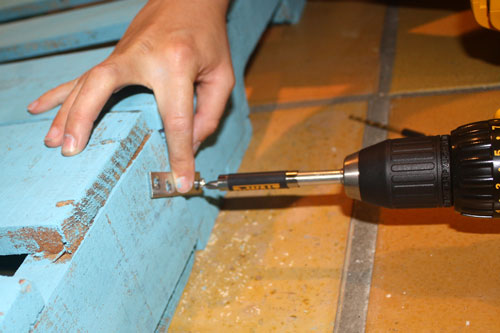
4. Attach individual layers
We used fewer brackets, so it makes it easier to take apart in case of moving. But, if you're pretty stationary or have kids who like to jump on the bed, then you could also apply brackets in the middle sections.
Lay the bottom layer of four pallets flat (they should equal around 80 inches by 100 inches, give or take a few centimeters). You'll attach mending braces in the middle sections where the pallets touch. We attached screws in the two outermost holes of the four-hole, 4-inch mending braces. You'll then lay the top layer of four pallets flat on top of this layer, and apply braces in the same areas.
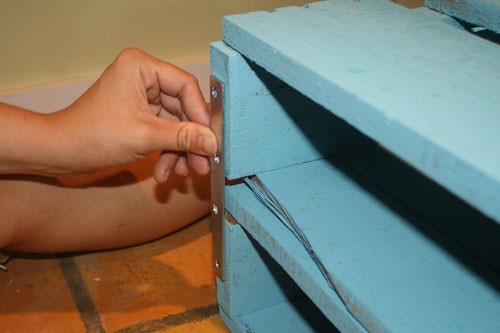
5. Attach the bottom layer to the top layer
You'll vertically attach one 10-inch flat straight bracket to each of the corners so that they attach the bottom and top layer of pallets. You can attach these on the inside corner or outside corner, depending on your preference.
TIPS:
- If a pallet is stamped with HT, it means it has been heat-treated rather than chemically treated, which is healthier to use for building purposes.
- An electric sander can be purchased for $30. If you don't use it, the project could take weeks.
- Paint the brackets and braces once they are attached to hide the metal color.
- It's necessary to use an electric drill with a bit to create a hole. By using a bit, you can prevent splitting the wood.


